

WHEN TO PLANT YOUR BARE ROOT ROSE
Knowing the best time to plant bare root roses is key to giving them a strong start. Generally, bare root roses are planted from January through May across the Northern Hemisphere, depending on your growing zone. Not sure what your growing zone is? The U.S. Department of Agriculture Hardiness Zone map is a helpful tool to figure it out.
Once you know your zone, you’ll have a better idea of when to plant. That said, there are exceptions. If you’re growing in a tunnel, greenhouse, or other sheltered space that mimics warmer conditions, you might plant earlier than your zone typically allows. And remember, no two growing seasons are the same. An unexpected cold snap in spring or an early heatwave in autumn can throw things off, so keep an eye on your local weather and conditions. The key to success is staying flexible and tuned in to your garden!
Recommended Planting Month by USDA Zone:
BARE ROOT ROSE PLANTING TOOLS & SUPPLIES

TIPS BEFORE YOU START
TIP #1: Dig the planting hole big enough to fit the root zone. Don’t worry about a specific depth or width—the classic recommendation is two-feet deep by two-feet wide—but my best advice is to dig a planting hole big enough to the depth of the bare root roses' roots.
TIP #2: Don’t throw in everything but the kitchen sink into the planting hole. Please, I beg of you, leave the hole alone! A quick search on the internet will give you so many recommendations—from bone and blood meal to fertilizers, and eggshells—that might make your head spin. If you add all of these “garnishes”, it’s like giving your roses a Long Island Iced Tea and the hangover to go with it. The plant won’t know what to do with the concoction. The foliage may yellow, the growth could be stunted, and the plant may even die. It turns out that adding the kitchen sink to your planting hole can actually hurt the soil and the rose, preventing the good guys like mycorrhizae from aiding root growth. I've found this to be true from my own research trails at my farm, but don't just take my word for it. For more information on the bone meal, amendments, and why you should leave them on the store shelf read this wonderful paper by Dr. Linda Chalker-Scott titled, “The Myth of Phosphate, Part II - Roses need phosphate fertilizer for root and flower growth.”
TIP #3: If you have time, get a soil test and use the results to determine how to amend the soil in your entire bed prior to planting. My favorite soil test is Soil Test Kit. This will ensure if you do need to add fertilizer or other materials, you can do so at the right rate and not give your roses a hangover. I don't throw anything extra in my soil without a yearly soil test. If you don’t have time to get a soil test or fully prepare a planting bed with compost and amendments prior to planting your bare root rose, that’s okay. Be sure to remove any weeds prior to planting, and rake away old debris or leaves from the planting area that could harbor diseases and insects. Dig your hole, plant your rose, and you’re good to go. Just get your rose in the ground. That’s the most important thing you can do to get it off to a good start.

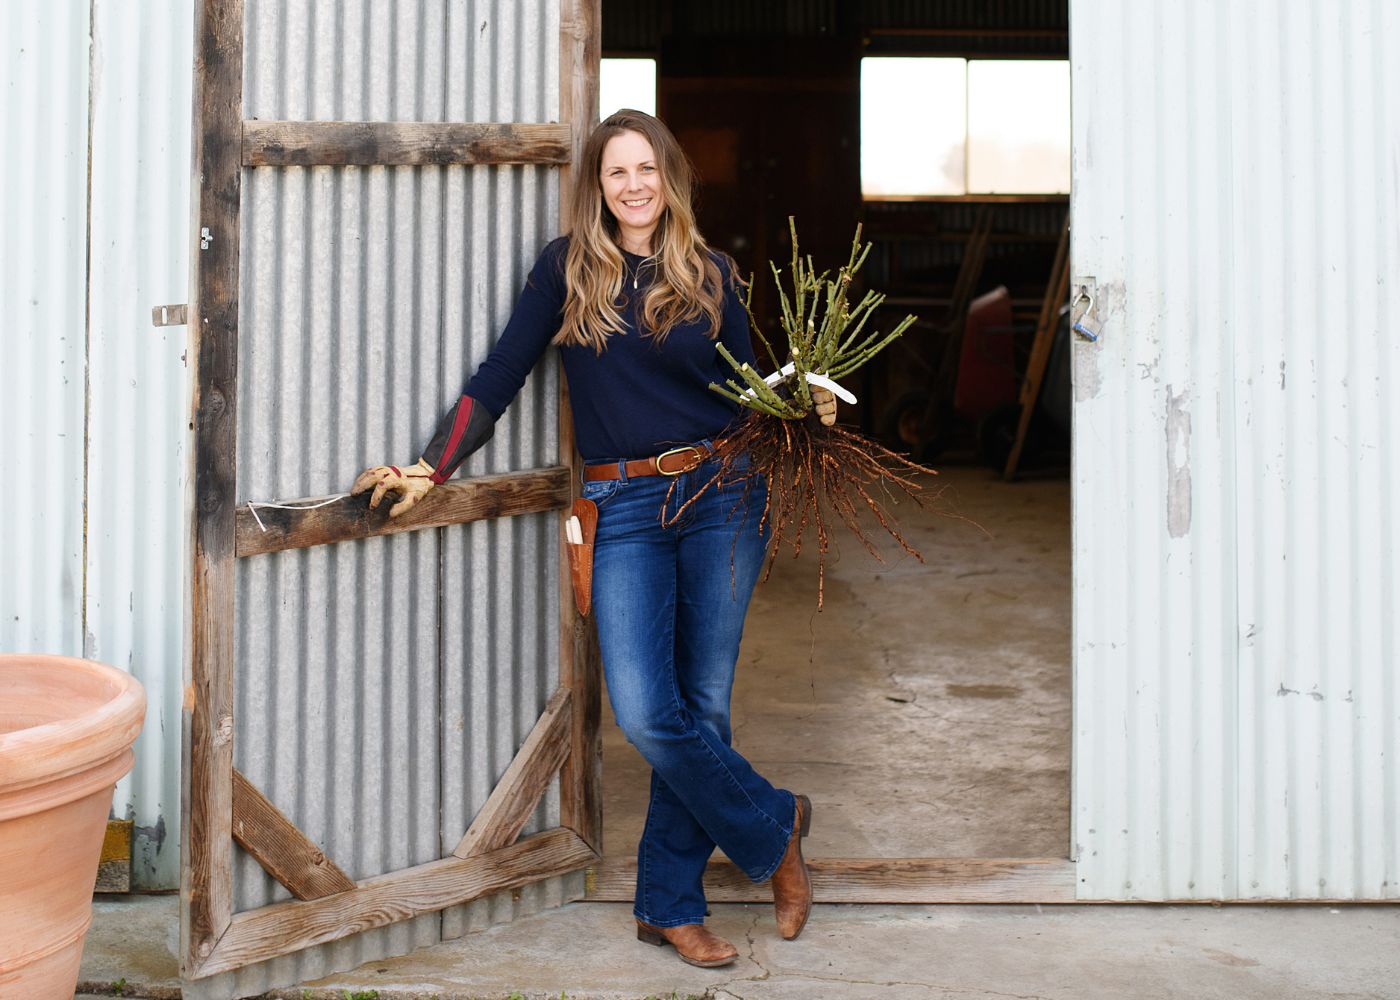
STEP 1: Unboxing, Inspection & Storage
Your bare root rose will arrive dormant with no soil or leaves, boxed and in a plastic bag. Shipping in a plastic bag insures the canes and roots remain moist in transit. You may think it is not alive but I promise it's just taking its winter nap.
Upon receipt of your box, open and inspect your rose for any damage. Please contact us within 72 hours if you see any damage to the rose that may have been caused in transit.
While we recommend planting your rose right away, if you are not able to plant immediately, wrap the rose back in the plastic bag it came in and leave it in a dark, cool location, with a temperature of 35-42 degrees F (such as a garage, basement or closet) for up to a week. If you are a flower farmer or floral designer with access to a floral cooler you can store the sealed bag in the cooler at 34 degrees F. Do not leave it in a location where it will freeze or in the warm interior of your house. Check on it daily to make sure it remains moist, but that mold and fungus are not developing on the canes of roots. The longer the rose is held, the more likely it will develop mold or decay on the canes and roots as well as use its stored energy to stay alive decreasing its vigor and chance of survival once planted.
The number-one mistake people make is leaving the bag open and letting the rose dry out. You may not see the damage from drying out right away, but one to two weeks after planting, the canes will turn black and the rose eventually dies. In the bare root stage, your rose needs to remain moist and cool to ensure that it stays viable until planting. Make friends with the mist setting on your garden hose nozzle and keep that rose moist and cool until you can plant it!
Late Planting Tip: If weather conditions or life prevent you from planting your rose after more than a week, I recommend you "heel in" your rose. "Heeling in" is a temporary planting of your rose. To "heel in" remove the rose from the bag and place it in a 5 gallon bucket, wheel barrow or large tub. Cover the roots with damp, not wet, potting soil or mulch. Store your container and rose in a dark basement or garage with temperatures 35-42 degrees. You can also "heel in" your rose by digging a trench in your yard and lay the rose at a 45 degree angle with the roots and 3/4 of the canes in the hole. Cover the rose loosely with soil and leave it there until you are ready to plant. "Heeling in" is only a temporary storage option and I highly advise planting your rose in its forever home as soon as conditions allow. Learn more in our blog post, How to Heel in Bare Root Roses.


STEP 2: PREPARING FOR PLANTING
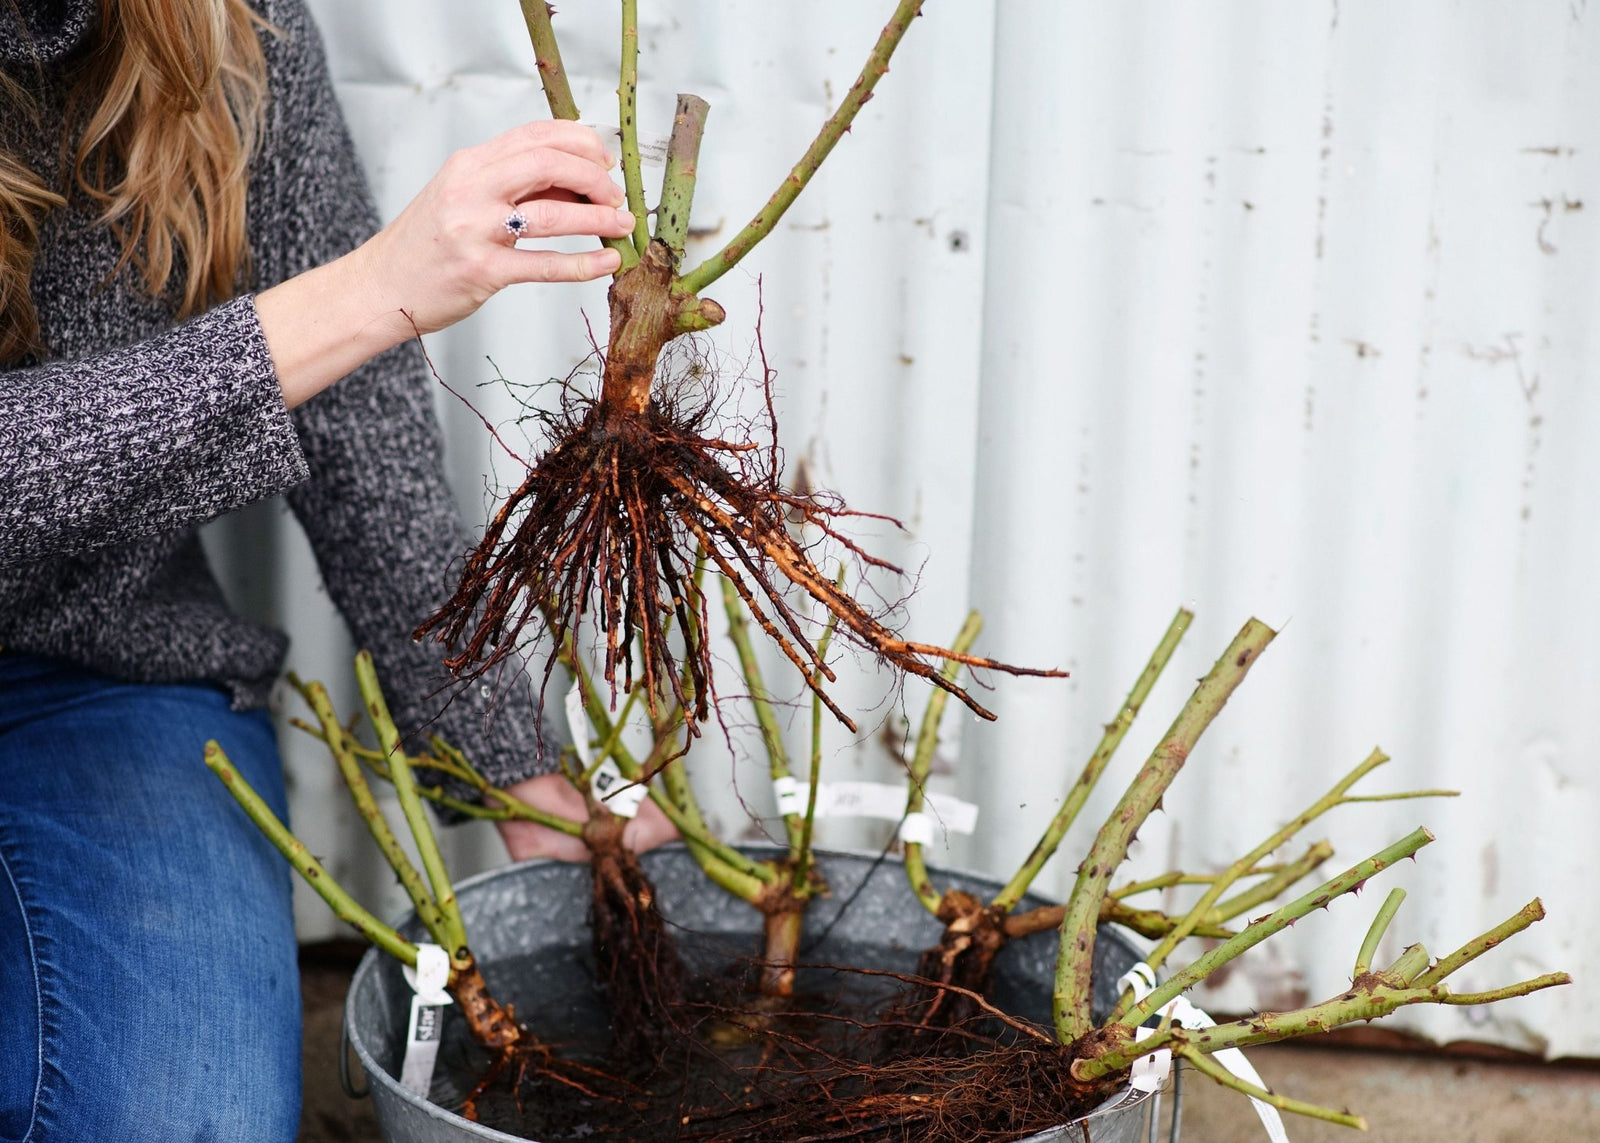
Remove your rose from the plastic bag or its temporary storage location. Trim any broken canes or roots from the plant. Make cane cuts 1/4" above a bud.
Fill a bucket or tub with water and soak the roots of the rose for 12-24 hours. This will help to rehydrate the roots of the rose and prepare it for planting. If you are not able to plant within 24 hours, remove the rose from the water bath and store back in the plastic bag.
Choose a planting site that has 6 hours of direct sunlight everyday and rich well drained soils. This could be in your native soil or in a decorative pot.
Dig a hole about 12-18 inches deep and wide depending on the size of the root structure of the rose.
Planting in native soil is fine however if you want to amend use a ratio of 1/3 high quality compost to 2/3 native soil.
DO NOT place any synthetic fertilizer or insect control product in the hole. This will void our plant guarantee and most likely kill your new rose.

STEP 3: Planting
For a little extra boost to stimulate root growth at planting, we sprinkle the roots of our bare root roses with mycorrhizae fungi. About 1 teaspoon to 1 tablespoon per plant just before placing in the hole. Follow the package directions on the brand of mycorrhizae you are using for exact application rate. This is not a necessary step for the viability of your plant but I’ve found it to be most helpful in giving the rose that little extra jumpstart to healthy root growth. I recommend Wildroot Organic Mycorrhizal Fungi Concentrate or Xtreme Gardening Mykos Granular Nutrient.
In the center of the hole, mound a cone shape of soil or compost. This mound will protect the roots from breaking and promote natural downward growth. Place the roots over the cone like an upside down martini glass.
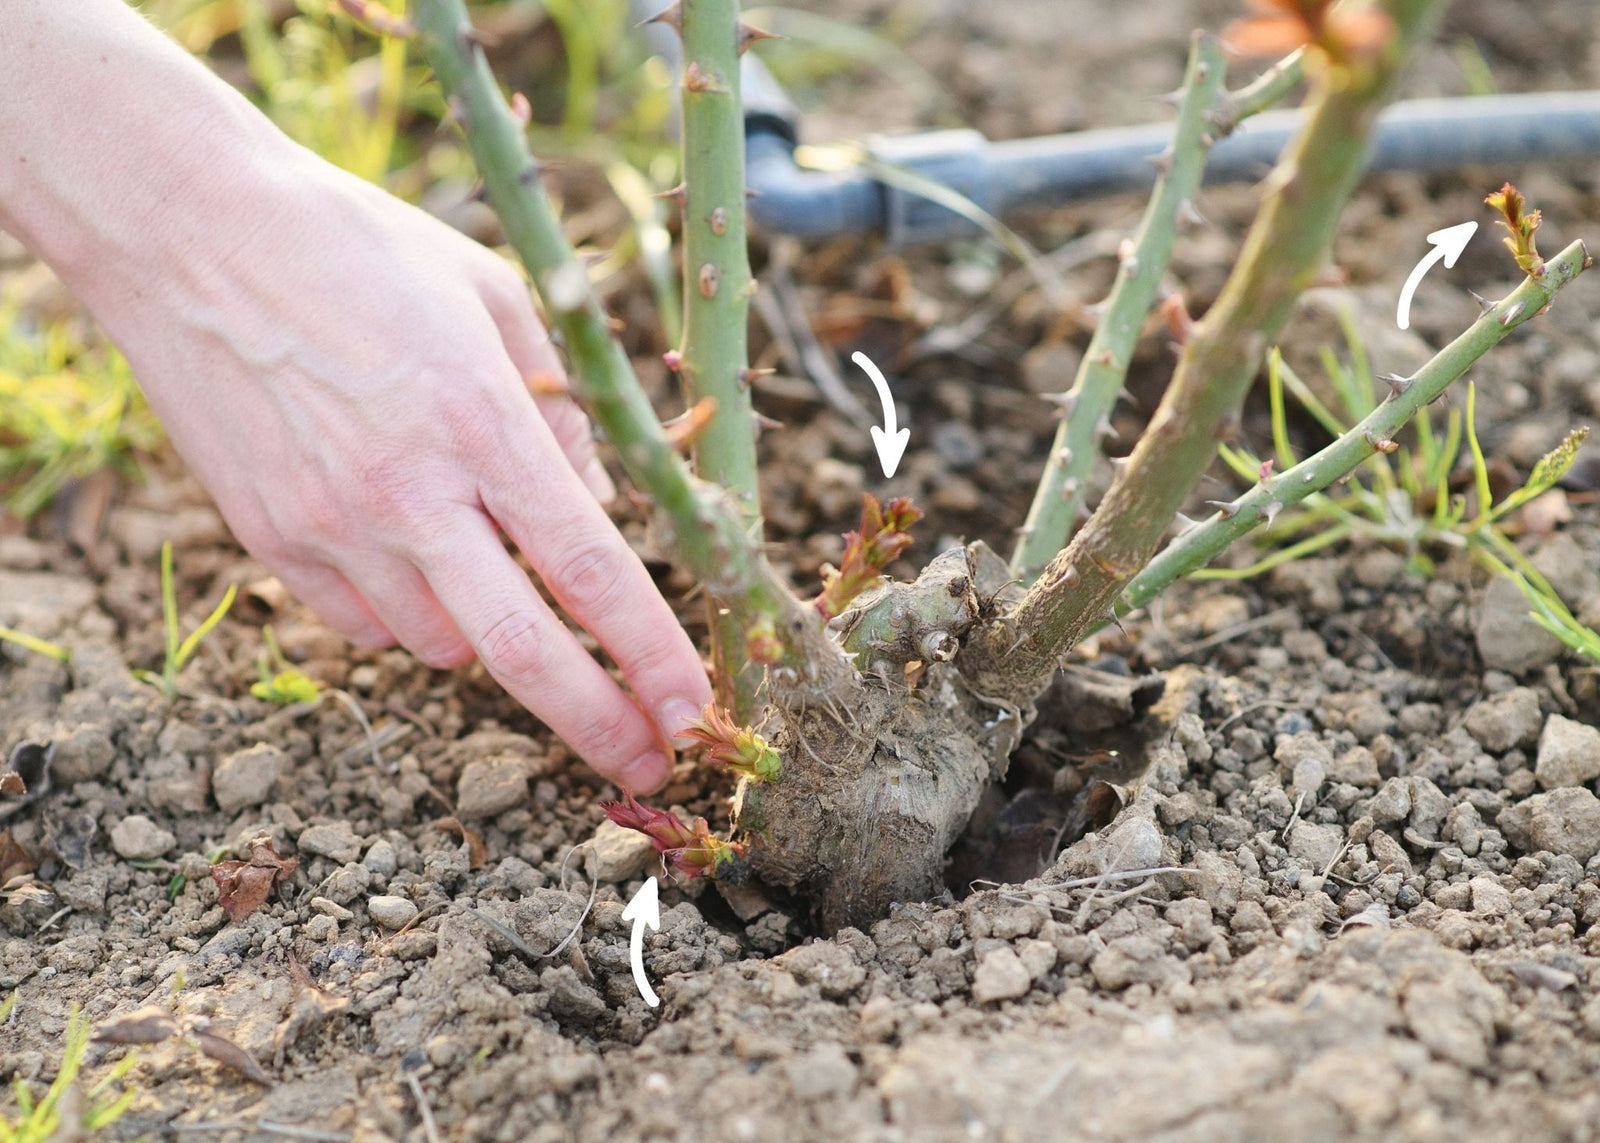
If you have a grafted rose, in cold weather regions I recommend planting the bud union 2-3 inches below the ground. In warmer weather regions I recommend you plant the bud union 1-2 inches above the ground. For own root roses plant to the base of the canes.

Fill in the hole and cover the roots with soil. Press firmly to remove air pockets, but do not compact the soil or push hard breaking the roots.
Cover to the base of canes with compost or compost + mulch layer. This will keep the feeder roots cool and moist in the warm summer weather, stabilize the plant in the event of wind and help keep the weeds controlled. Take care to cover all of the roots with soil. Check on the plant one to two weeks post planting to see if there was any settling/sinking. If so and the roots have become exposed apply more soil or compost + mulch.
WATCH MY STEP-BY-STEP VIDEO SERIES ON BARE ROOT ROSE PLANTING


STEP 4: POST-PLANTING CARE
Water your rose plants daily for a minimum of 1-2 weeks with overhead water to keep the canes and roots hydrated as the plant is getting established. If you get a lot of rain you can skip the step. You want the soil to stay moist to a depths of 12 inches but you do not want to have any pooling or standing water. The amount of water you need to apply will depend on your soil type and weather conditions. You can continue to overhead water beyond 2 weeks as needed depending on how quickly your rose plant develops. When you see the first buds begin to push out you can stop overhead watering.
After you see buds start to push, place the plants on a drip irrigation system or hand water at the base of the rose as needed. Roses like to be moist in the root zone depth but do not like standing water.
DO NOT apply any rose fertilizer until you see your first set of leaves push out. Give the rose time to get established before adding anything extra to the soil. After the first full sets of leaves appear, feed the plant with a balanced rose fertilizer once every 6-8 weeks. If you didn’t get a soil test before planting, consider getting one post planting so you can learn how to amend your soil with the ideal elements for your location. If your soil is already high in nutrients, you may not even need to apply fertilizer. Any well balanced rose fertilizer from your local nursery will do just fine. Some of my favorite fertilizers are E.B. Stone Rose Fertilizer Granular & Dr. Earth Rose & Flower Fertilizer Granular. Stop fertilizing six weeks before your first frost date.
DO NOT use any granular systemic insect or fungicide control product on your rose the first year.For year one and beyond I recommend foliar applications of Neem Oil, PyGanic, and Spinosad for insect and disease control.

Photos by: Jill Carmel Photography & Ashley Lima
This post may contain affiliate links. I make a small commission if you purchase a product from the link. I only recommend products I love and use in hopes they will help you too!