Easy Dormant Spray For Disease & Insect Care
Welcome to the final week of our dormant pruning theme. We're wrapping it all up with one crucial step you don't want to miss—applying your dormant spray. Trust me, this isn't just an optional task; it's a must do for beautiful in-season blooms. I learned this the hard way one season when I didn't spray a section in my rose field because we had very late wet winter storms and it was too muddy to get in the field. The result? Families of aphids and thrips came alive, wreaking havoc! Trust me when I say—your future self (and your roses) will thank you for not missing your dormant spray applications.
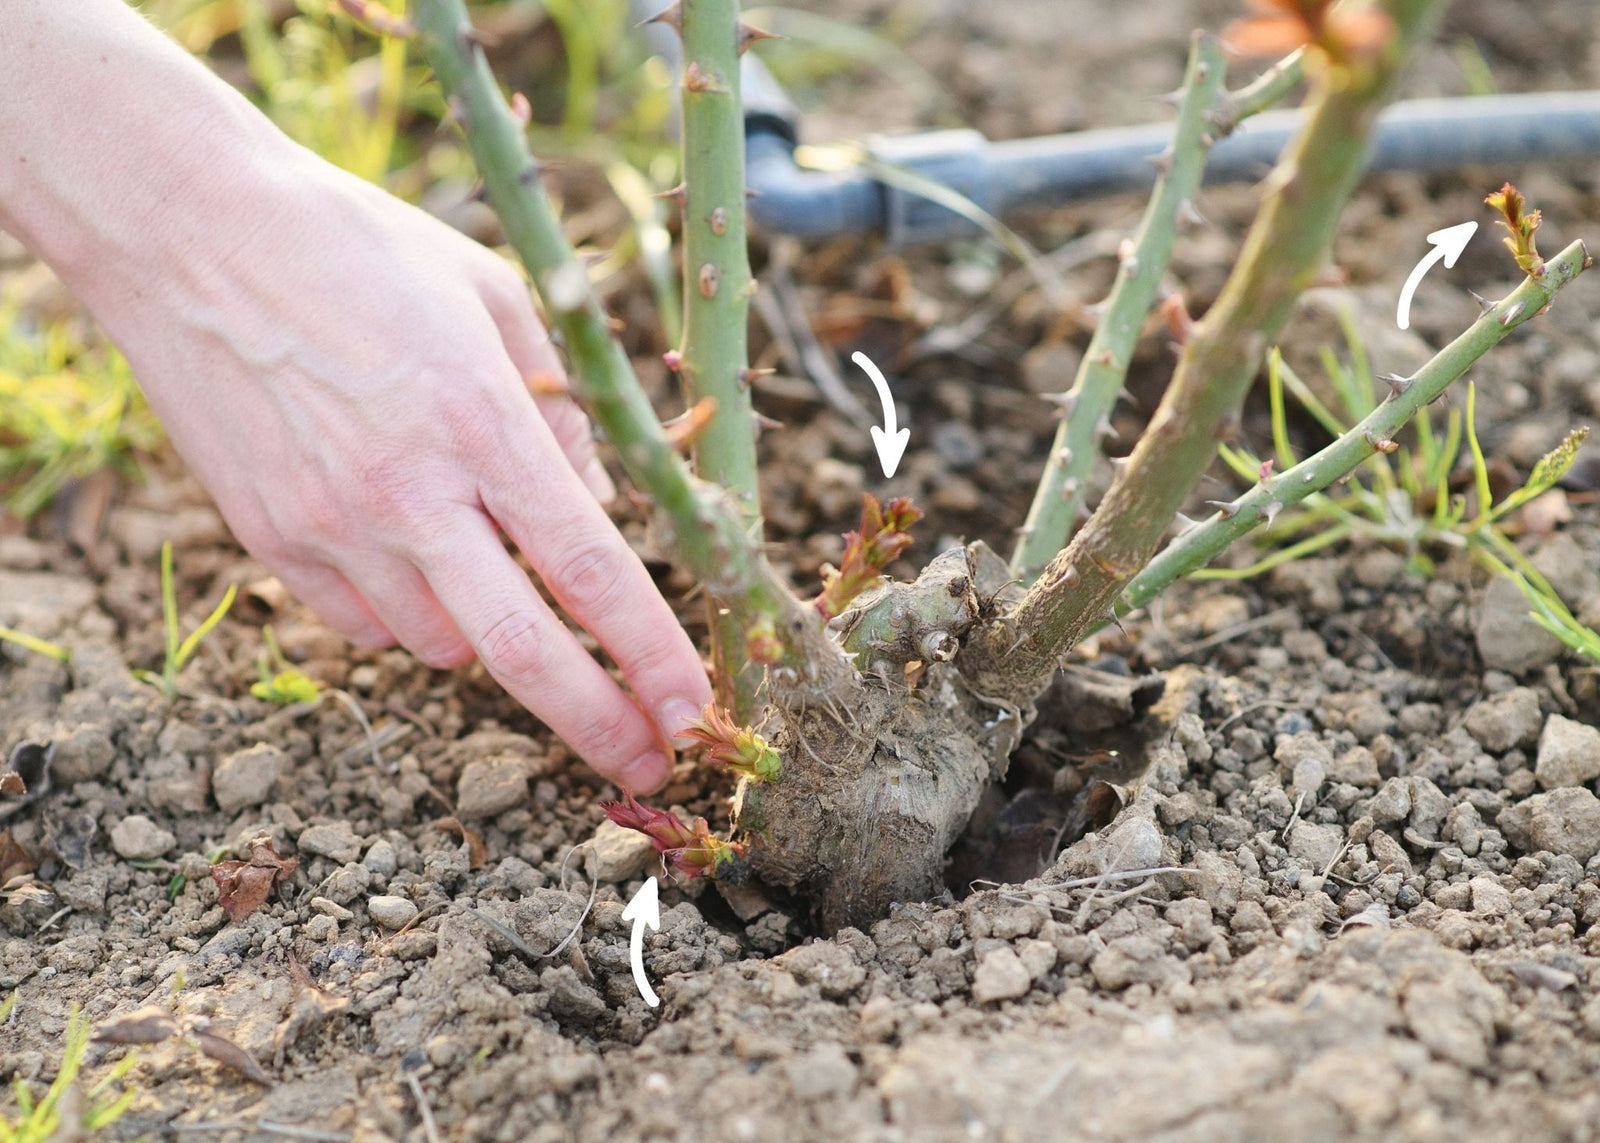
After finishing your dormant pruning, take a moment to clean the rose bed. This is the time to remove all debris and old rose plant material & leaves around the base of your roses. Yes, every little leaf and stem - toss everything into the trash—not the compost bin. Why? Overwintering diseases and pests could be hiding within that plant material, just waiting for the warm weather to thrive. Think of this cleanup as setting the stage for a fresh, healthy growing season.
Once your rose beds are cleared, it's time to kick off your dormant spray routine. Timing is key here—you'll want to apply your spray within a week of dormant pruning and ideally before the buds start to push out. My approach is simple, effective, and organic, bringing great results year after year. Start with two straightforward products: a horticultural oil and a copper spray. Copper, available in liquid form, is my favorite fungicide here on the farm. It's a powerhouse disease control, but be sure to follow the label application rate directions, as too much copper can cause burning to the plant. Follow this up with horticultural oil—it's a fantastic insecticide that works by smothering overwintering insects. Together, these two are an unbeatable team for keeping diseases and pests under control in your rose garden. Make sure to spray on a dry, calm day when temperatures are above 40°F (4°C) but below 85°F (29°C).
For a more comprehensive routine, you can also include a follow-up (non-organic) systemic treatment once you see the first stages of new leaf growth to tackle additional overwintering diseases. Apply a systemic fungicide like propiconazole. It's amazing for preventing black spot, rust, and powdery mildew. Unlike copper, propiconazole is absorbed by the plant, giving you longer-lasting protection. Aim to apply your first and second fungicide treatments a minimum of two weeks apart. If you want to stay all organic you can just apply a second round of liquid copper or lime sulfur instead of the propiconazole. Using this friendly, strategic approach will set your roses up for success, helping them grow strong and stay healthy throughout the season!
Proper application is key to success—check the product label and use the correct application rate, pay attention to the intervals between applications and and avoid spraying while pollinators are out and about. And don't skip protective gear! Always wear proper PPE (personal protective equipment) to ensure you're protecting not only your plants but yourself.
The truth is, most people fail at disease control because they don't follow the directions for the correct application rate or apply the product not as directed on the label. If you want to elevate your gardening skills, consider taking a chemical application safety class through your local agricultural extension or master gardener program. Or grab my favorite chemical safety book. It's a great way to learn how to read labels, mix products, apply them safely and really master this essential part of rose care. And remember, even organic products are still chemicals that need to be handled with care.
This week's action step is simple but powerful—apply your dormant spray for your roses (or make a plan too if it's not quite time in your zone). If you've already completed pruning and spraying for the season, take these final winter days to reflect on your process. Jot down notes in your gardening journal or rose diary. Capturing what worked well (and what didn't) will only make your process better next year.
Next week, we're kicking off March with a whole new theme. Spring is right around the corner, and I can't wait to guide you through best practices and what to expect caring for a new bare root rose during it's first year in the ground. I'd love to help you answer any questions you have about first year bare root roses so be sure to subscribe to my newsletter and submit them to my Ask Felicia Q&A.
THE LIST: THINGS I'M LOVING THIS WEEK
- It seems like it is always cut and scrape season on the farm. I just got a nasty cut on my knuckle last week. These band-aids are my absolute favorite for keeping those little injuries clean and dry so they can heal. They fit PERFECTLY under work gloves and stay in place, even when wet. Definitely a must-have for any gardener's toolkit!
- Every influencer out there seems to have their favorite tripod, but I'm no influencer—just a no-tech farmer trying to figure out all this new stuff. I've tried more tripods than I can count, and most of them were either total junk, too tricky to open, or just not sturdy enough. You get the idea. But I finally found a tripod that's SIMPLE, easy to use, and perfect for recording all the action on the farm.
- Dreaming of spring and carrying baskets of ROSES from the garden and my new linen apron.
- Easy skillet meal for the week that my whole family LOVES - Creamy Tuscan Chicken and Rice.
- Sunday Comfort Care - OUAI Rose Foaming Body cleanser that smells like heaven.
CHEERS,


JOIN THE FUN!
Want this delivered directly to your inbox each week? CLICK HERE to subscribe to my new weekly newsletter, Growing Wonder, for simple tips on thriving roses, gardens, and homes! Each week, subscribers can submit questions for me to answer, and if yours is selected for our Q&A feature, you'll win a $25 digital gift card to the Menagerie Shop!
You can also find me on Instagram for more rose garden inspiration and exclusive behind-the-scenes moments. You can check out my favorite rose varieties and browse garden supplies at the Menagerie Shop! I also have all of things I love for my home, garden and life in easy to find collections on my Amazon Storefront and my new ShopMy Page.
Photos by: Jill Carmel Photography
This post may contain affiliate links. I make a small commission if you purchase a product from the link. I only recommend products I love and use in hopes they will help you too!